Step 1. Downloading PuTTY and PuTTYgen
To download, visit the official website. You can download the installer package in MSI (Windows Installer) format, which includes both PuTTY and PuTTYgen, or download them separately without the installer.
If you downloaded the PuTTY installer in MSI format, run it and follow the instructions displayed in the wizard.
Step 2. Generating Key Pair with PuTTY Key Generator (PuTTYgen)
Launch the PuTTYgen program from the list of programs, which you can find in the "Start" menu (Windows) or on the desktop if you've created a shortcut.
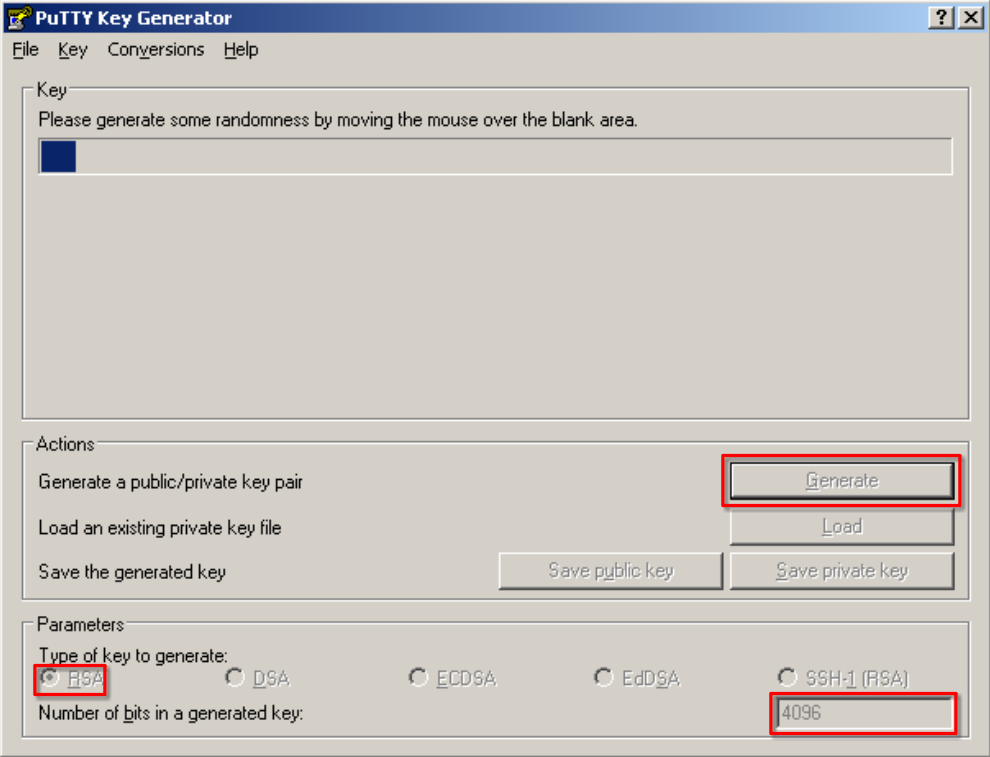
In the PuTTY Key Generator window, set the key type to RSA and the key length to 4096 instead of 2048 (Number of bits in a generated key). Then, click the Generate button to initiate the key pair generation process.
Move the mouse cursor within the program window to generate random numbers; this process typically takes a few seconds.
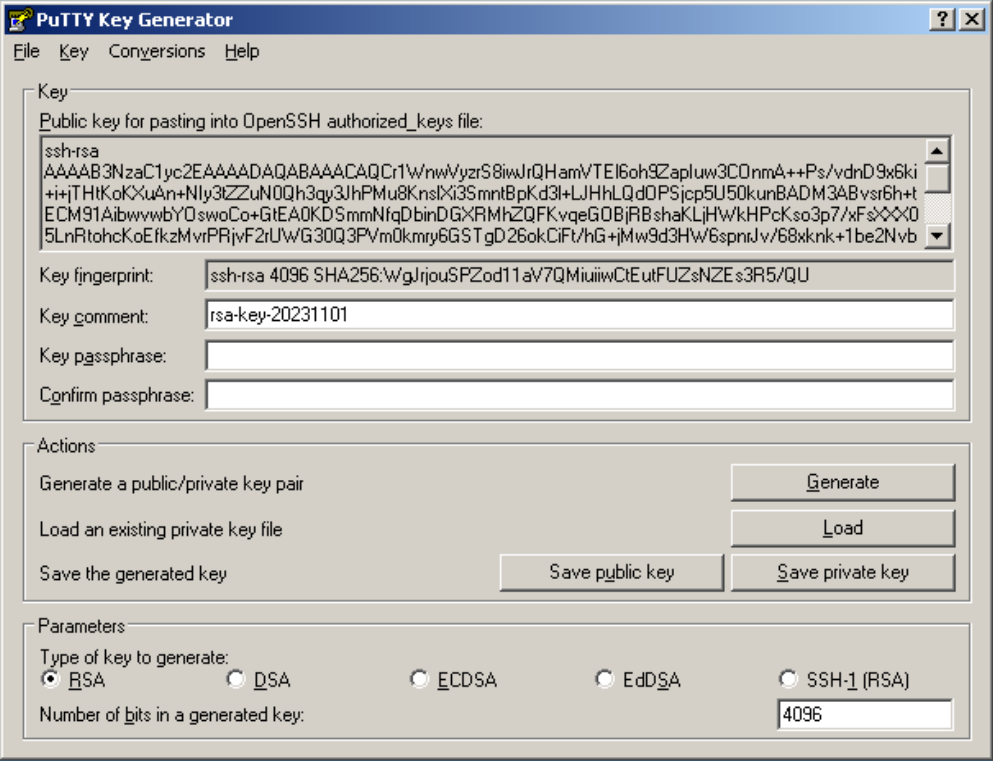
After key generation is complete, you will see information about the public key, including Key fingerprint and Key comment. You can modify the data in the Key comment field to make it more informative for your purposes.
Step 3. Password Protecting the Private Key (Optional)
If you wish to secure your private key with a password, enter it in the Key passphrase and Confirm passphrase fields. In this example, we will not explore this option.
Step 4. Saving the Keys
To save the public key, copy the contents of the Public key for pasting into OpenSSH authorized_keys file field and paste it into a separate text file, for example, myserver-ssh-key.pub.txt.
To save the private key, click the Save private key button. In the pop-up window, confirm that you want to save the private key without a passphrase, specify a file name (e.g., myserver-ssh-key), and the .ppk extension will be added automatically.
Step 5. Copying the Public Key to the Server
There are several options for copying the public key:
- Copying through connecting to the server via SSH or using the xterm.js console.
- Copying through the personal cabinet.
Let's consider each of these options.
1. Copying through connecting to the server via SSH or xterm.js console
Connect to the server using SSH or the xterm.js console located in the VPS control panel. Navigate to the home directory of the user for whom you want to enable SSH key login. All examples will be described for the root user.
Create the /root/.ssh folder in the user's home directory and set permissions for it:
# mkdir -p /root/.ssh && chown root:root /root/.ssh && chmod 700 /root/.ssh
Create a file to store the public SSH key and set permissions for it:
# touch /root/.ssh/authorized_keys && chown root:root /root/.ssh/authorized_keys && chmod 600 /root/.ssh/authorized_keys
Open the file /root/.ssh/authorized_keys with a text editor to add the public key:
# vi /root/.ssh/authorized_keys
Add the public key to the end of the file (contents from the myserver-ssh-key.pub.txt file). Ensure it is written on a single line and save the file by pressing Esc, :wq, and Enter.
ssh-rsa AAAAB3NzaC1yc2EAAAADAQABAAACAQCr1WnwVyzrS8iwJrQHamVTEl6oh9ZapIuw3COnmA++Ps/vdnD9x6ki+i+jTHtKoKXuAn+NIy3tZZuN0Qh3qy3JhPMu8KnsIXi3SmntBpKd3l+LJHhLQdOPSjcp5U50kunBADM3ABvsr6h+tECM91AibwvwbYOswoCo+GtEA0KDSmmNfqDbinDGXRMhZQFKvqeGOBjRBshaKLjHWkHPcKso3p7/xFsXXX05LnRtohcKoEfkzMvrPRjvF2rUWG30Q3PVm0kmry6GSTgD26okCiFt/hG+jMw9d3HW6spnrJv/68xknk+1be2Nvb4byrVKHbdOXO7evEiFBeW6ehnPbMC9jFGxbTEwewp0D6fEqdK4oW4ZPWWRy36rTC0WqDN4vtw+SBwFG6AsouTjEqSqQdighxoDs+vjugDxC9IwV0PfeiK3RWPYMvguBeAWK3WZQzP7MtiTnj91xt2fqvapMwa6w2okVjTy69bPuQ9ioEJBr001l8j2oYY/WwCJB7h0mdY2Vb/WLpqO2gTGhZHIB/dsISrSBOhdAAeY/fHAmWYgJx5tBniut52Lcw3EPp3M5PeGGMSsC1Oxs6rEez7V1ZupZbdlXmoZgOPF3aqyecWtmUPD7CM+XCypMg23UXFuN2Rfw+Qk/uwkr5w3KiYrLS0kH/DlE+91V51T+rgDNSwkVw== rsa-key-20231101
2. Copying through the control panel (Works only if qemu-guest-agent is installed on the VPS)
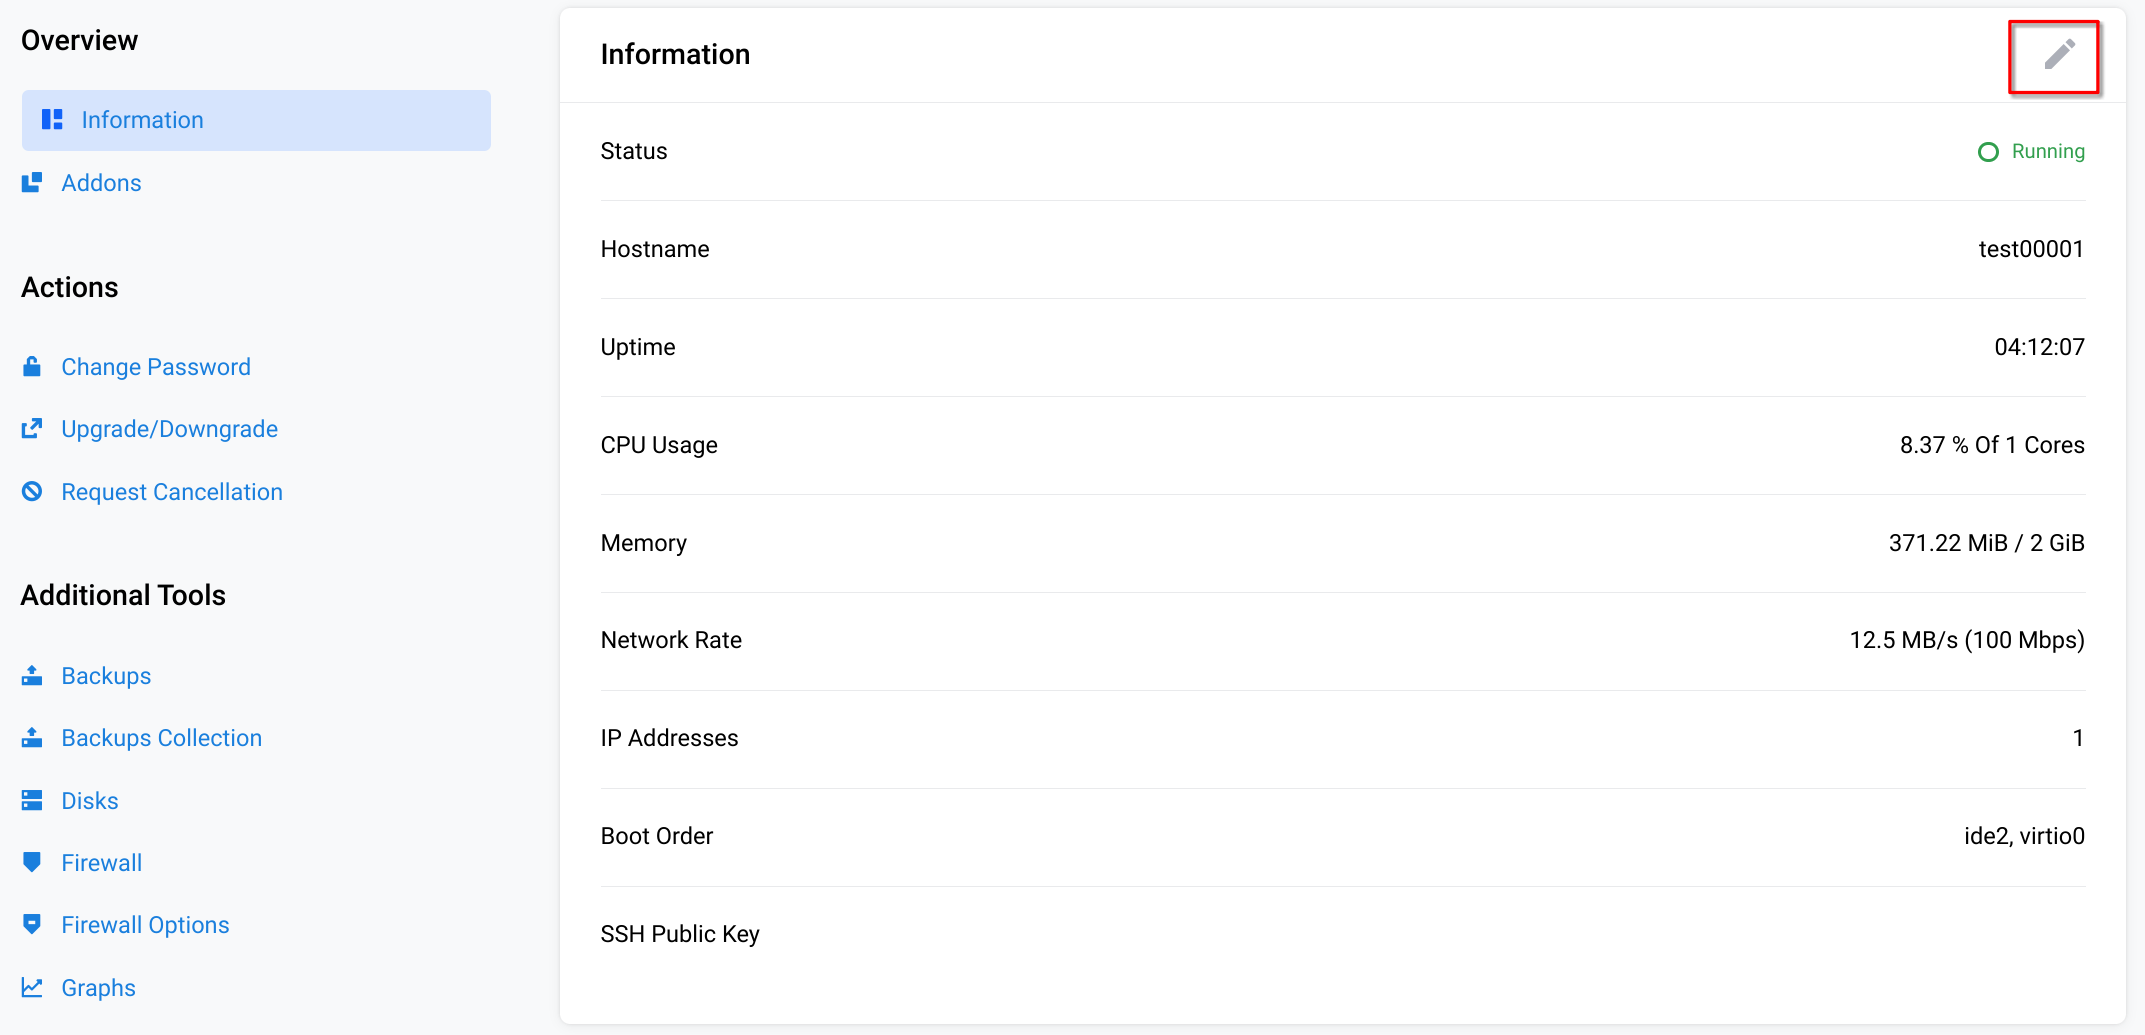
Navigate to the control panel and go to the service page. Select the relevant VPS and click the Manage button. Scroll down the page until you see the information block, then click the "pencil" icon in the top right corner.
In the opened modal window, enter the public key and save.
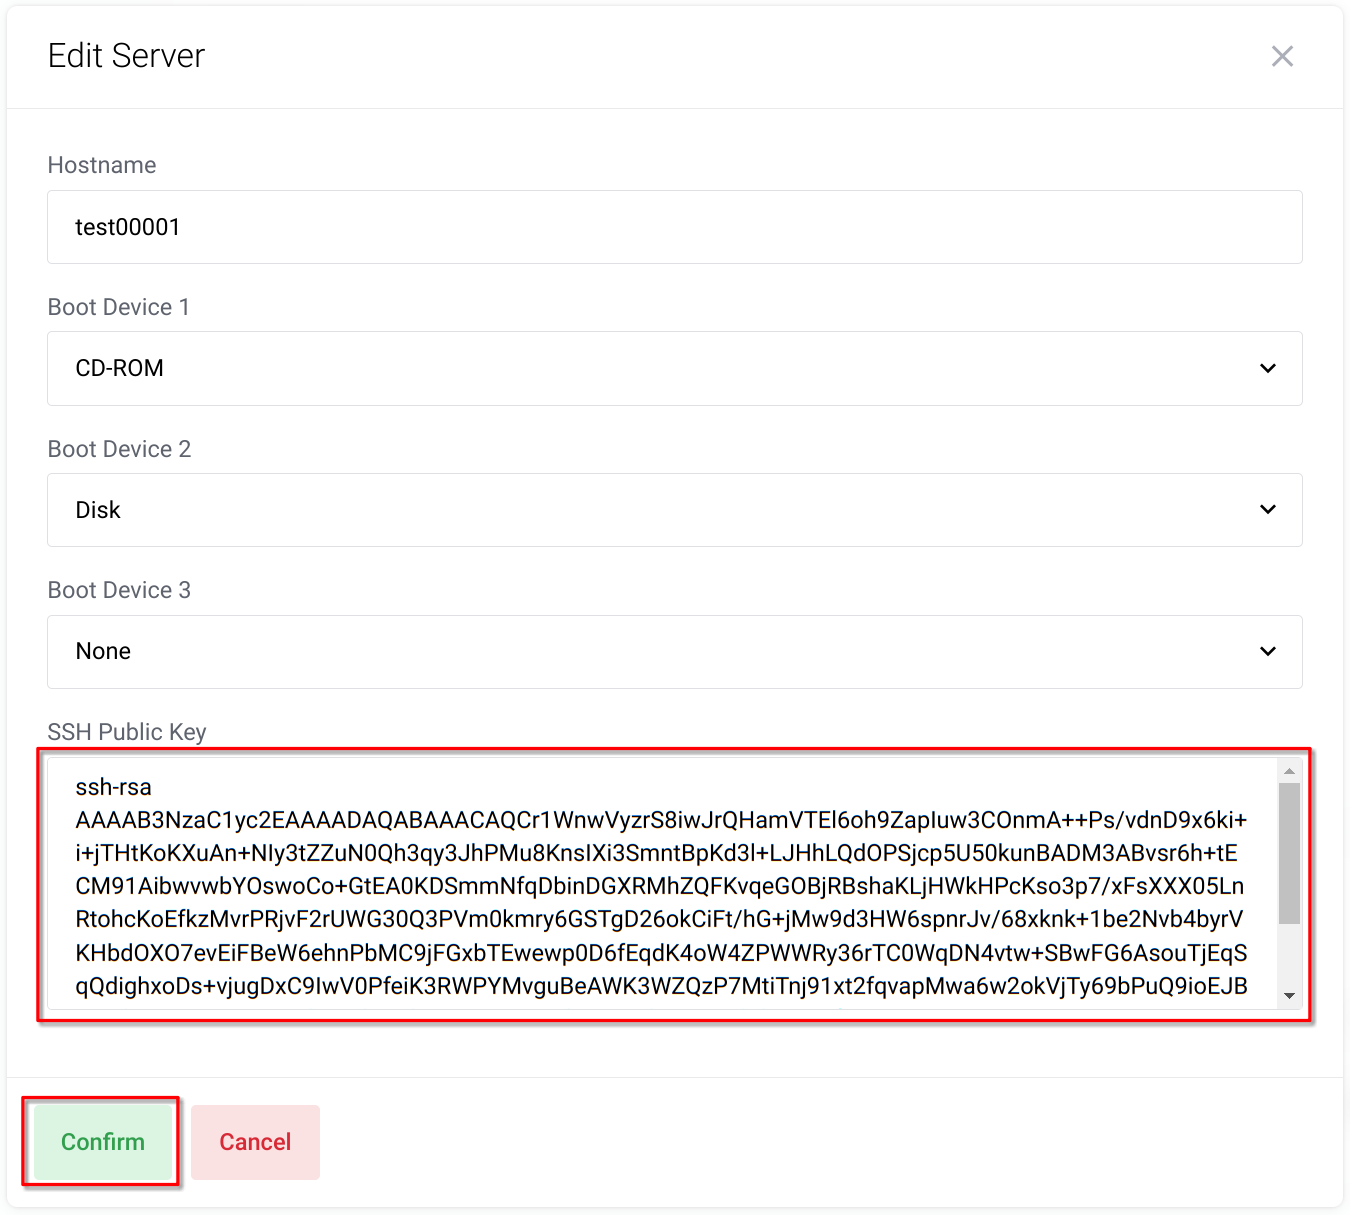
Note: This method works only if qemu-guest-agent is installed on the VPS.
Step 6. Connecting to the server using authentication keys
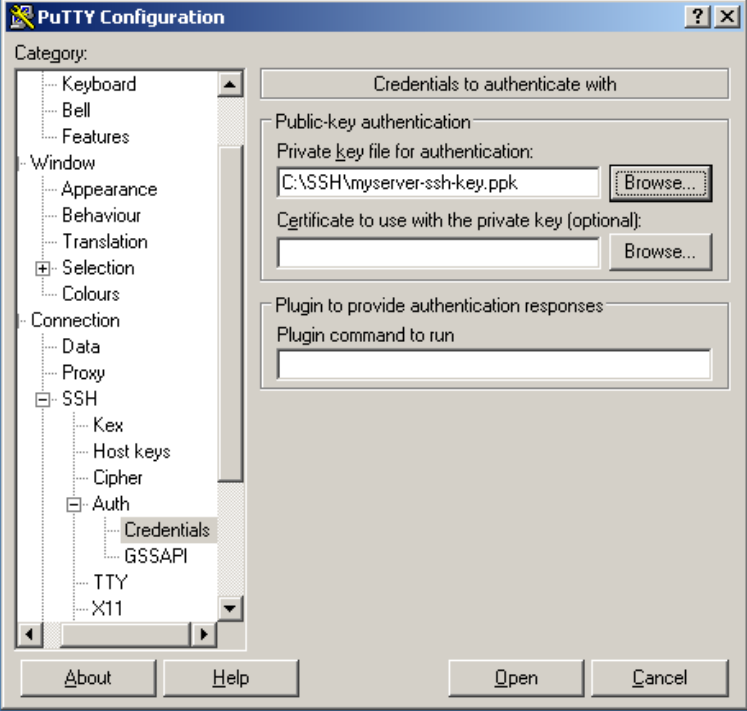
Launch PuTTY (putty.exe) and specify the private key for authentication. To do this, go to Connection ⇒ SSH ⇒ Auth ⇒ Credentials, click Browse next to the Private key file for authentication field, and select the previously saved private key (myserver-ssh-key.ppk).
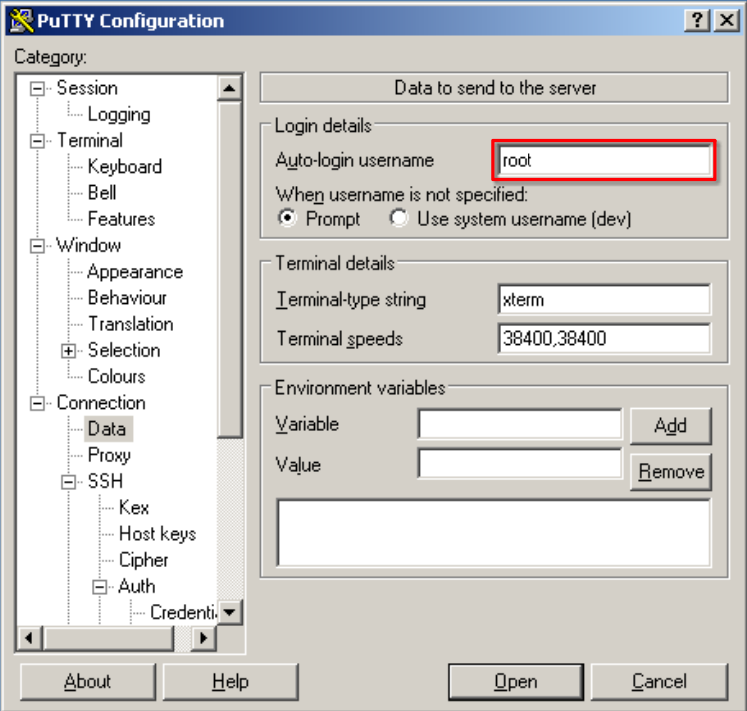
Additionally, specify the username by navigating to Connection ⇒ Data, and in the Auto-login username field, enter the username. In our example, this is root.
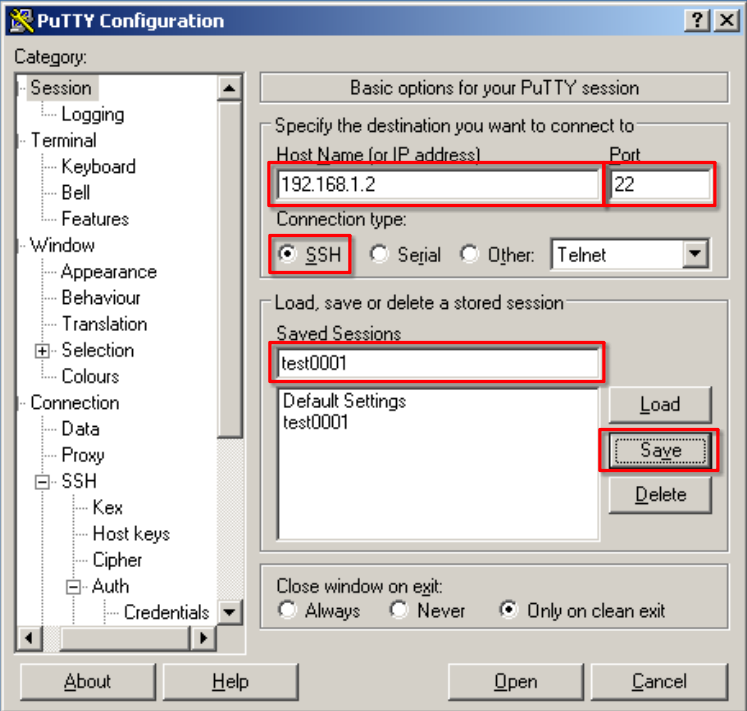
To avoid repeating these settings each time, let's save the current session. To do this, go to the Session section and in the Saved Session field, give a name to the current session. Enter the IP address or hostname of the remote server, specify the SSH server's port in the Port field (default is 22), and click the Save button.
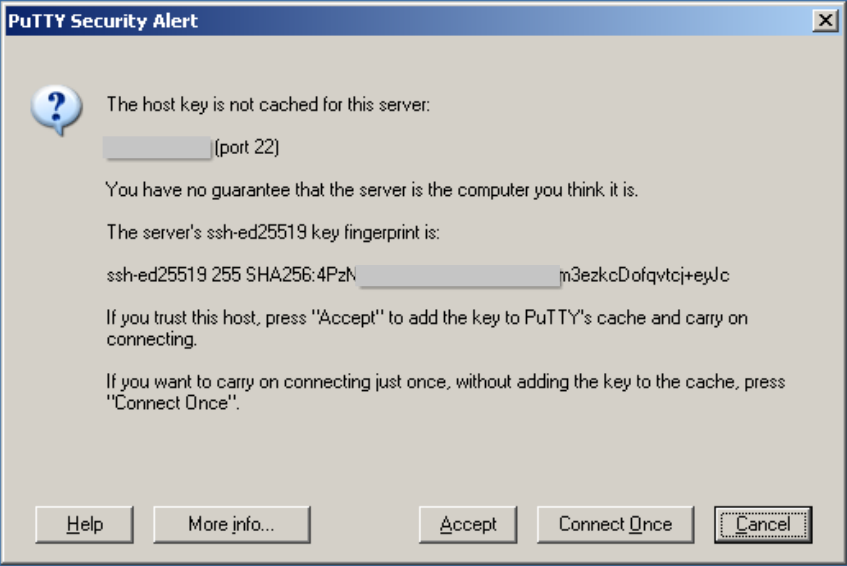
Now, to connect to the server, click the Open button. If connecting to this server for the first time, a warning may appear about a mismatched fingerprint. If you are confident that the fingerprint is correct, click the Accept button.
Afterward, the console will open, and automatic login will occur without requesting a password.