


Virtual Private Cloud Network (VPCN) is a private, dedicated Layer-2 network inside a single datacenter that lets your virtual servers talk to each other, completely isolated from other customers. Traffic on this network never touches the public internet and is invisible to anyone outside your account - it is your own internal segment.
When you need it
- A private link between an application server and its database, with no public exposure.
- Internal replication, backups and clustering between your servers.
- A separate management / service segment.
- Anything where your servers should reach each other by private IP instead of over the internet.
Before you start
- A Virtual Private Cloud Network is tied to one datacenter. You can attach only the VPS that live in that same datacenter.
- Order a Virtual Private Cloud Network (VPCN) service for the datacenter you need. After checkout, open the service in your client area - you land straight on the network management page.
Management is organised into four tabs:
| Tab | What it does |
|---|---|
| Network | Attach / detach VPS, set subnets and IPs, apply changes (Deploy) |
| Revisions | History of saved configurations (drafts and deployed) |
| Tasks | Progress of background jobs (attach, detach, deploy) |
| Settings | Service details and cancellation |
The one thing to understand: you build a draft, then Deploy
Changes on the Network tab are not applied immediately. You first assemble the configuration you want - which servers are on the network and which IPs they get - and then press Deploy to apply it. Until you press Deploy, everything is just an unsaved draft.
Deployment runs in the background: the system queues a task and a worker creates or updates the network adapters on your VPS step by step. The result is not instant - the Tasks tab shows its progress.
Three states - do not mix them up
| State | How you create it | Where it lives | Live on the VPS? |
|---|---|---|---|
| Unsaved changes | any edit in the Network form | in the form only; lost on reload | No |
| Saved draft | the Save as draft button | Revisions tab, status draft | No |
| Deployed | the Deploy button, then Confirm | Revisions tab, status deployed | Yes |
Good to know:
- Deploy also saves a revision (the confirm dialog has name and note fields), so you do not have to Save as draft first.
- Edit on a draft loads it back into the Network form.
- Rollback = open an older revision on the Revisions tab and Deploy it again.
Step by step: put multiple servers on a private network
1. Open the Network tab. Your active VPS in this datacenter are listed automatically - there is nothing to add by hand.
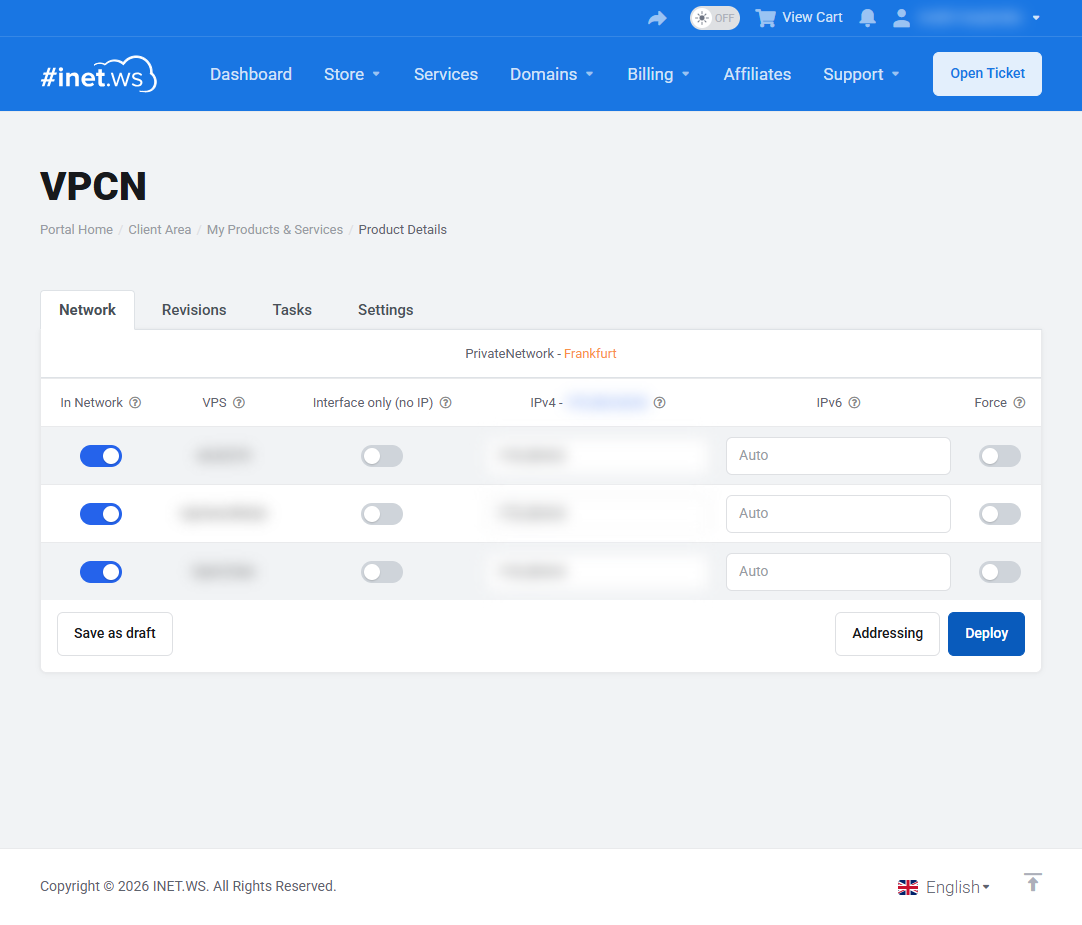
2. Turn on the servers you want with the In Network toggle.
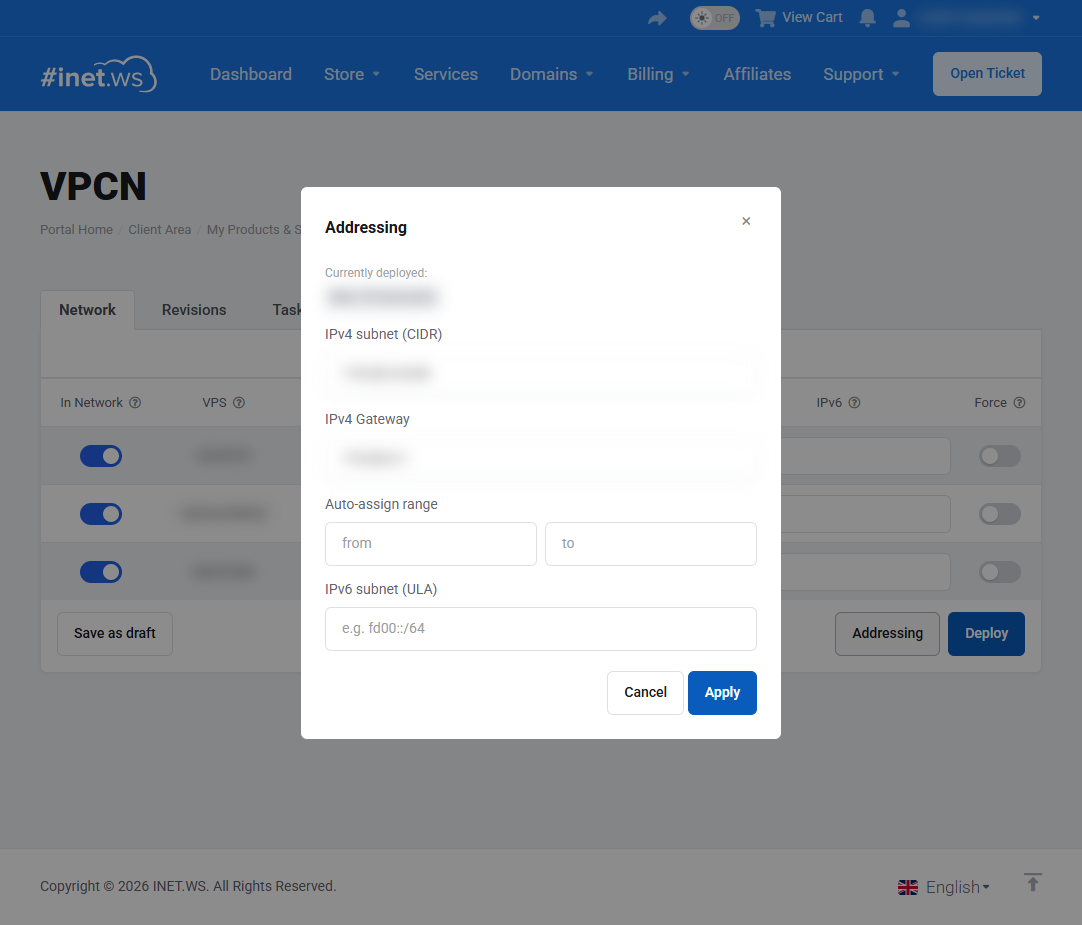
3. Define the subnet. Click Addressing and set the private range you need, for example 10.20.0.1/24. The address you type becomes the gateway; leave the auto-assign range empty to use the whole subnet.
4. Assign IPs (optional). In the IPv4 column, leave a field empty for Auto (the system picks a free address) or type a specific address for manual mode. Choose Interface only (no IP) if you prefer to configure addressing inside the guest OS yourself.
5. Click Deploy. The system validates the configuration:
- if there are errors, a Cannot deploy dialog lists them;
- if everything is fine, a Review and confirm dialog shows the summary (VPS to IPv4 to IPv6) and lets you name the configuration and leave a note so you can find it quickly later. The Configuration name and Note fields are optional.
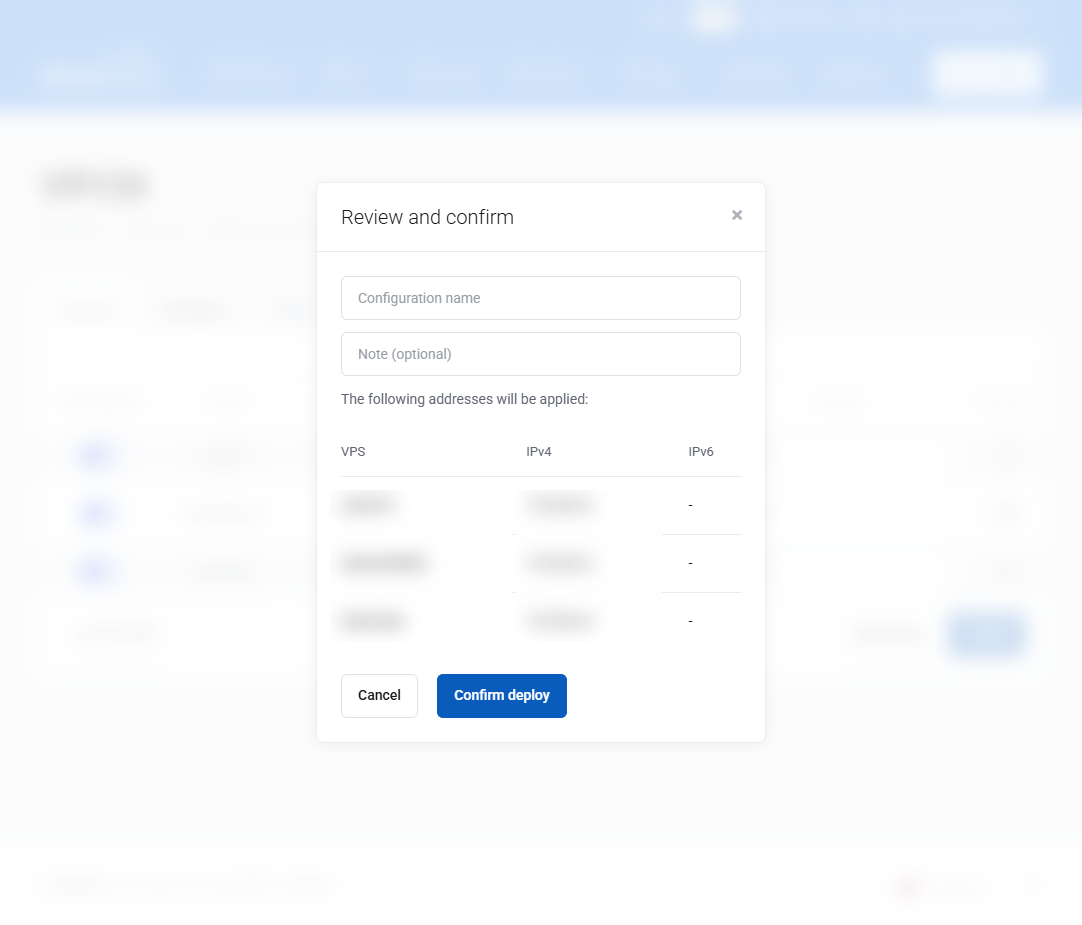
6. Confirm deploy. The task is queued. A "New configuration - applying" badge appears and the controls lock while it runs. While the task is still waiting you can stop it with Cancel deploy.
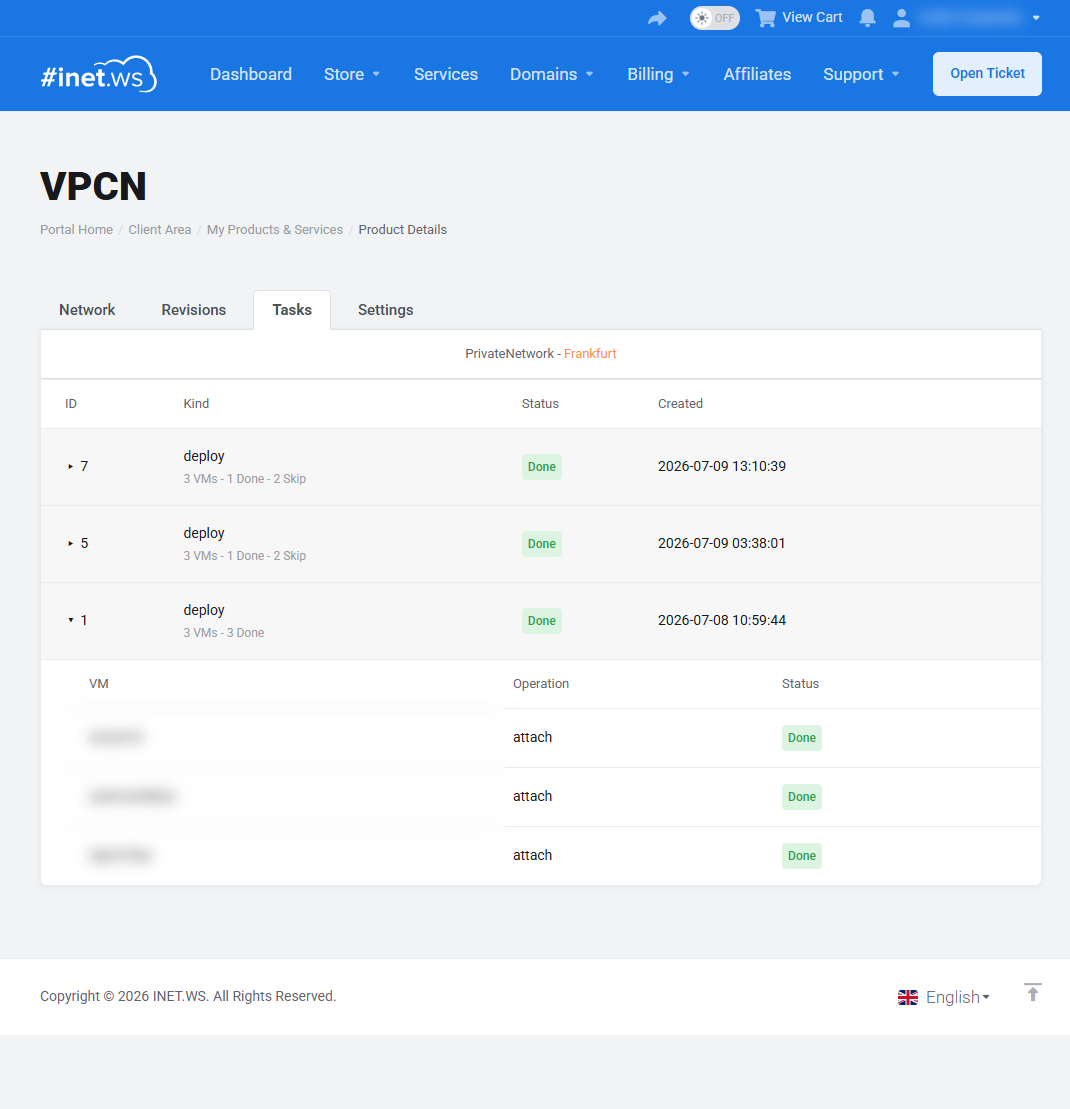
7. Checking progress - the Tasks tab. The task gradually reaches Done. Opening a task shows the per-server breakdown (VM to Operation to Status).
That is it - your servers can now reach each other over the private subnet.
Reference: Network tab columns
- In Network - attach / detach toggle (applied on Deploy).
- VPS - the server name (the link opens the VPS service page).
- Type - the Proxmox service kind (VPS or Cloud); shown only when the list has both.
- Interface only (no IP) - create the adapter without an IP; you handle addressing inside the VPS yourself.
- IPv4 - the address; empty = Auto, a typed value = manual. The header shows the current subnet.
- IPv6 - the same for IPv6 (optional).
- Force - re-create the interface on Deploy even if the IP did not change (off = unchanged interfaces are skipped).
The Addressing dialog
- IPv4 subnet (CIDR) - the subnet in CIDR notation, e.g.
10.20.0.0/24. The first usable address becomes the gateway by default and can be changed; private RFC1918 ranges are used. - IPv4 Gateway - leave empty to use the subnet's first address.
- Auto-assign range (from / to) - the pool for Auto mode; empty bounds mean first to last host.
- IPv6 subnet (ULA) - e.g.
fd00::/64.
Reference: Revisions tab
Every saved configuration with its name, note, status (draft or deployed) and the created / deployed dates.
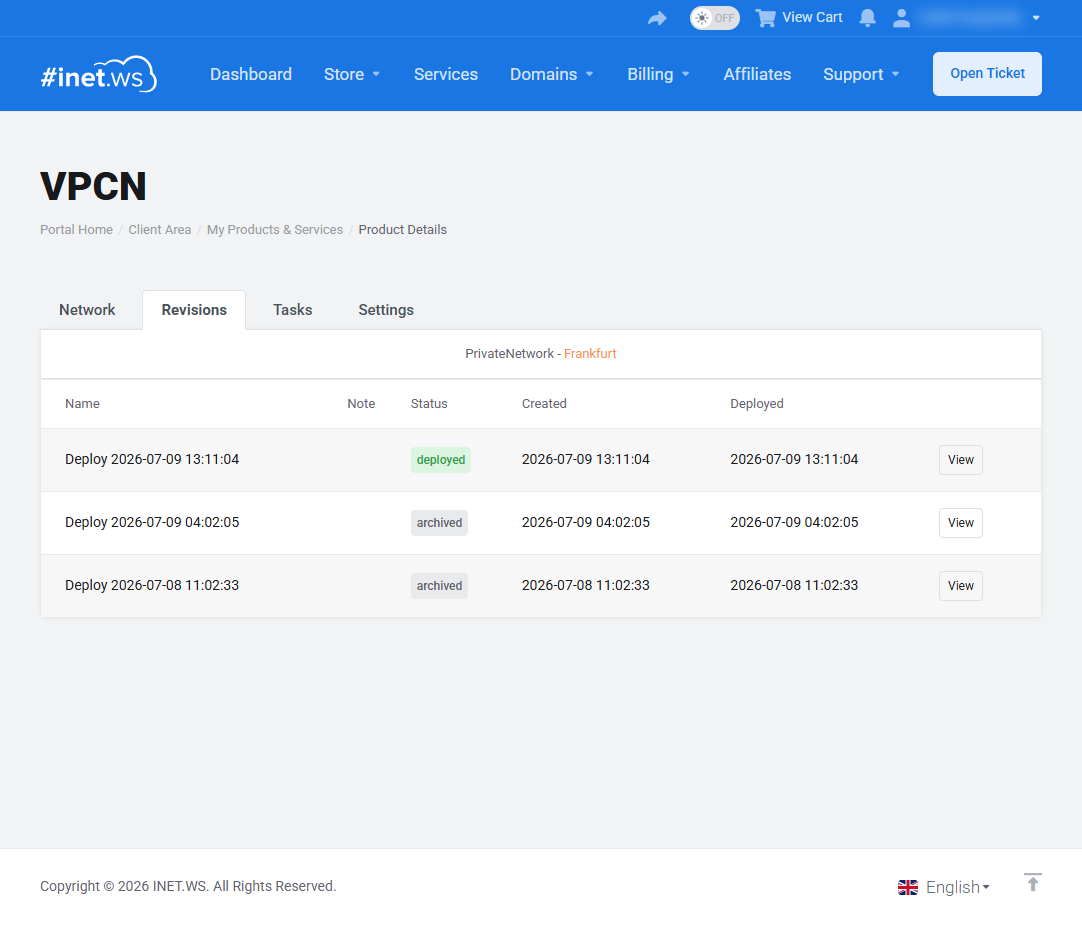
- View - see the full configuration.
- Edit - open a draft in the Network form (drafts only).
- Delete - remove a draft (drafts only).
Reference: Tasks statuses
| Status | Meaning |
|---|---|
| Pending | The task has been created but has not started yet |
| Working | The task is running right now |
| Waiting | The task is waiting for a long operation on the hypervisor side to finish |
| Done | The task finished successfully |
| Error | The task finished with an error |
| Cancelled | The task was cancelled |
| Skip | The task was skipped because there are no new changes since the previous run |
Settings and cancellation
The Settings tab shows status, registration date, the recurring amount and billing cycle, the next due date and payment method, and it holds the Request Cancellation button. On cancellation you choose a reason and a type - Immediate (processed within the next few hours, not literally instant) or End of Billing Period.
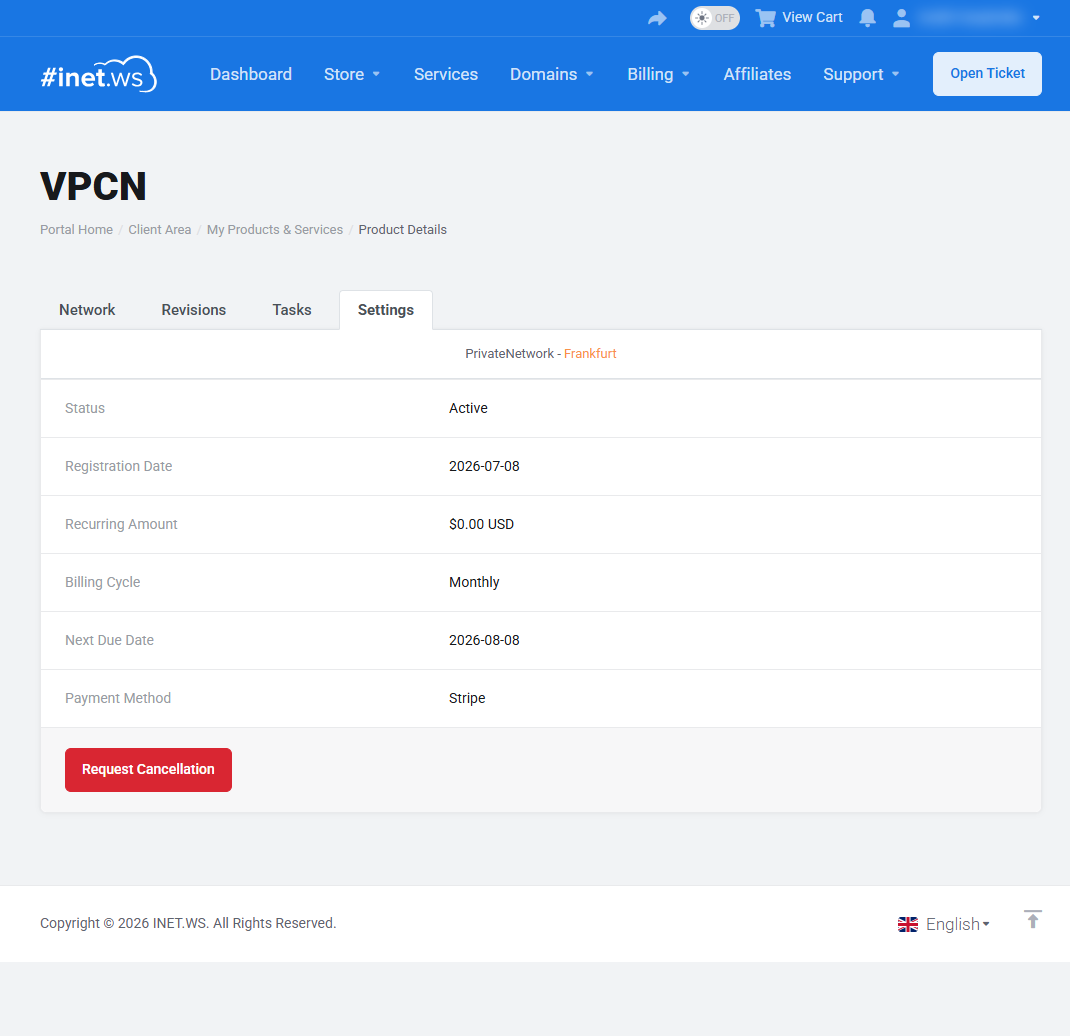
About the network adapter. On cancellation the VPCN adapters on your VPS are disconnected and deactivated, but the adapter itself remains. We deliberately do not hot-remove it, because some operating systems do not handle live removal of a network adapter cleanly (risk of the VM hanging). If you want it removed entirely, please contact support.